Renting an Asset
Step-by-Step Tutorial
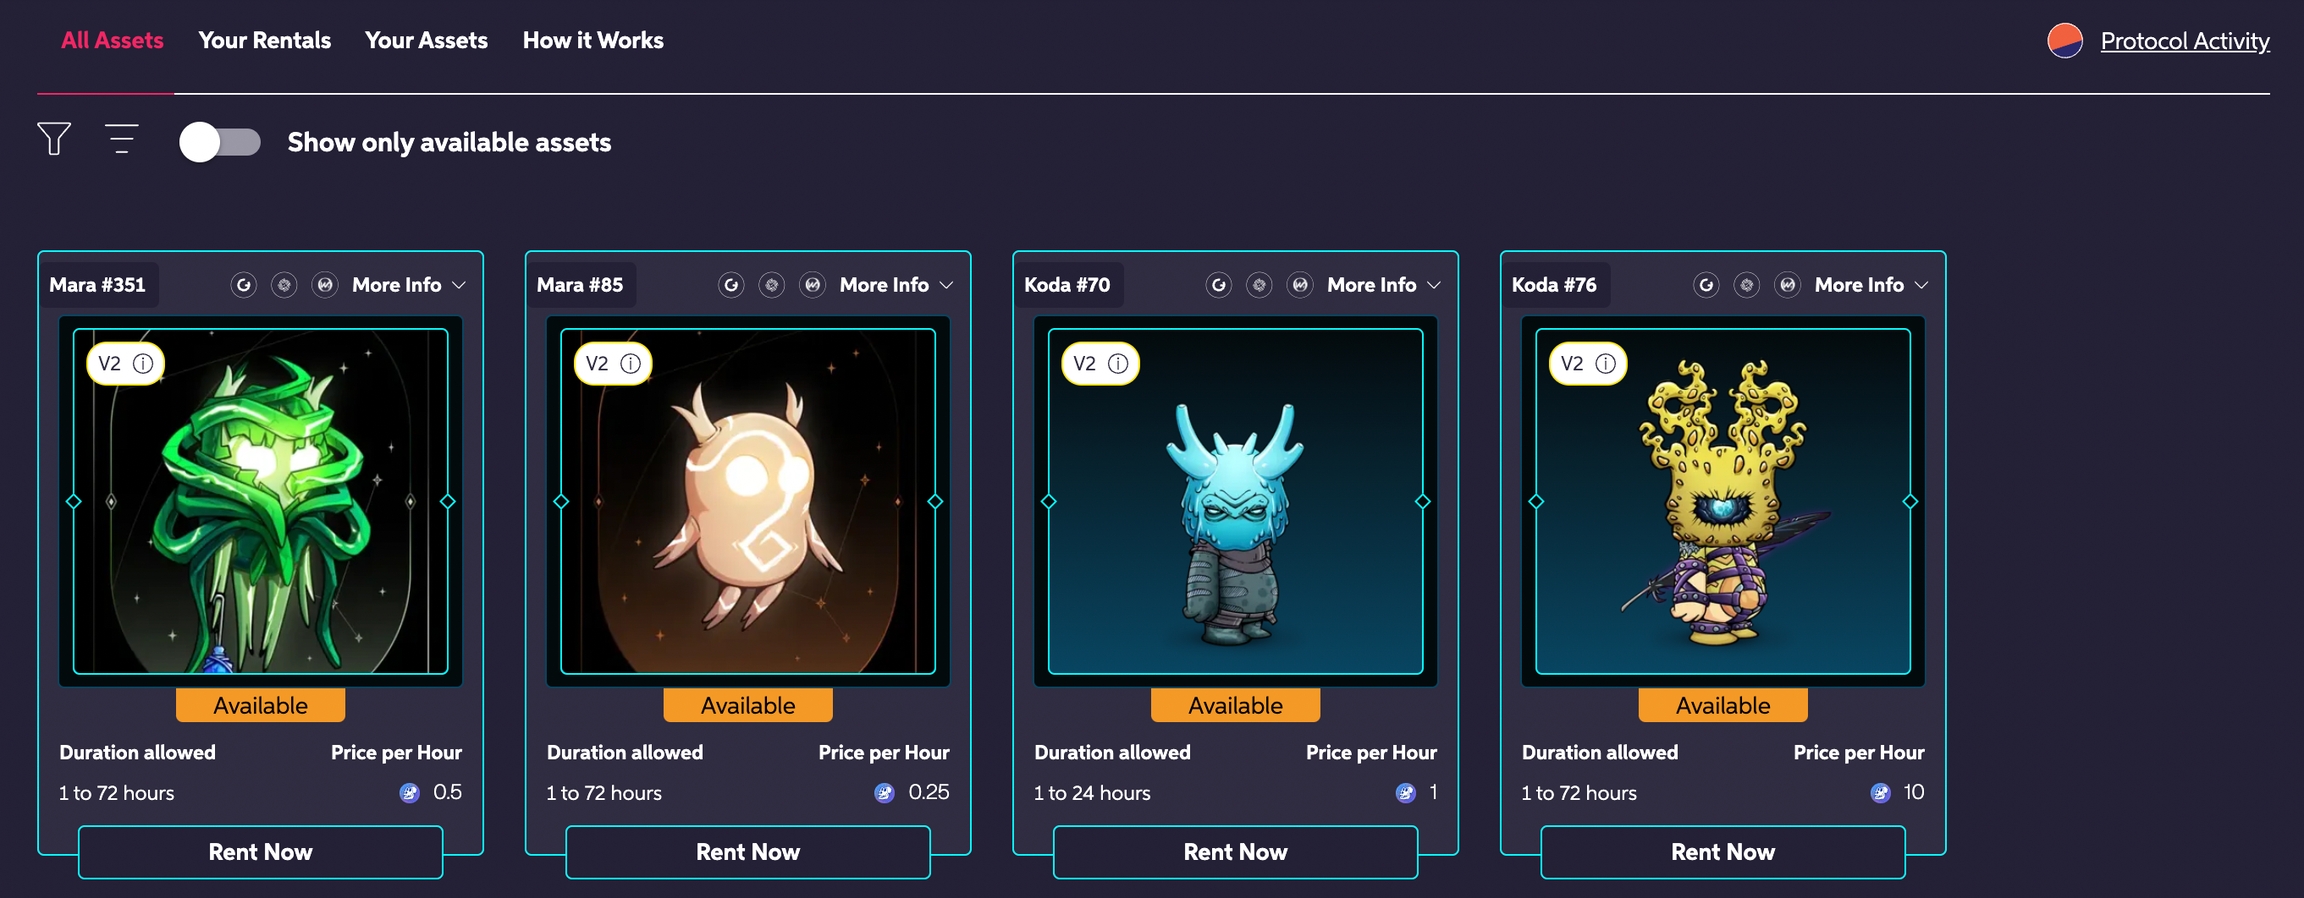
Go to the All Assets page. Here, you can browse all the listed assets, including those currently being rented, or toggle the "Show available Assets only" to see only the assets available for rent right now.
If you're renting an Oda and are overwhelmed by the variety of options, visit our FAQ to learn more about what you should look for when renting an Oda.
Choose the asset you wish to rent by clicking its "Rent Now" button.
Pro tip!
You can use filters to narrow the displayed assets down to those that have the attributes you want.
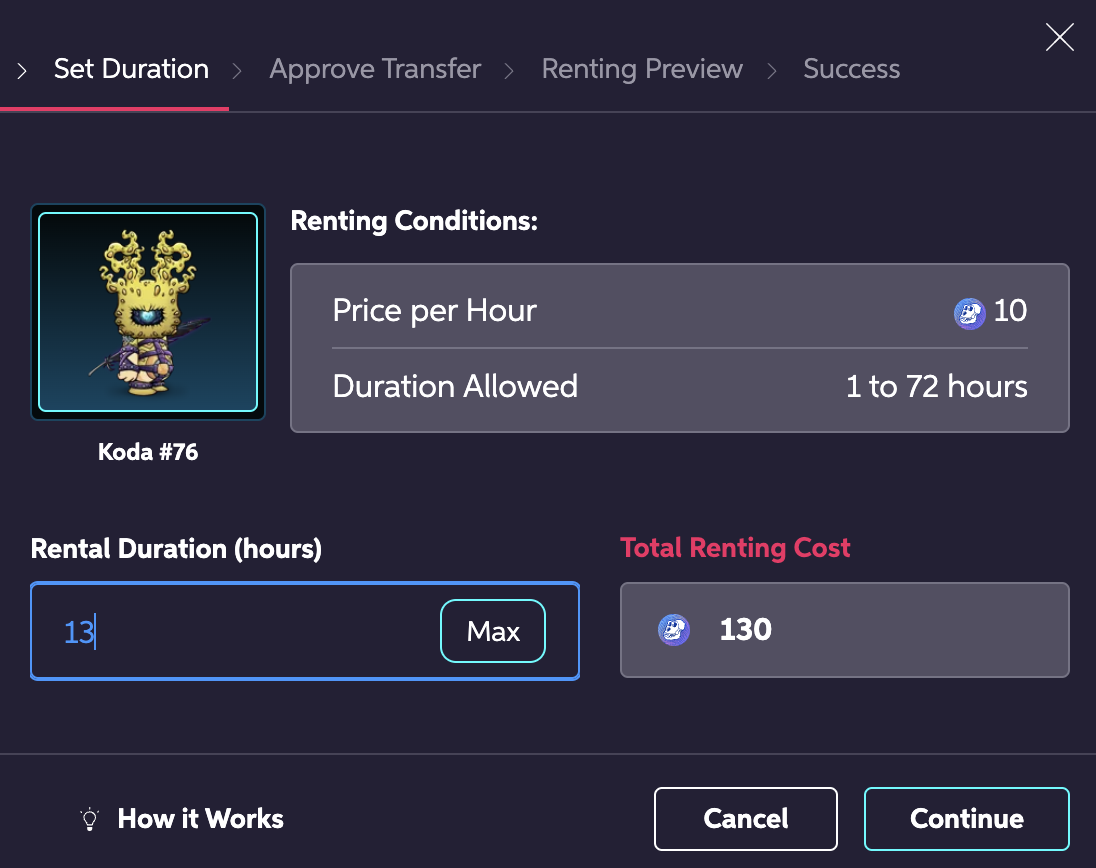
Define the rental duration (within the minimum and maximum allowed by the listing you chose).
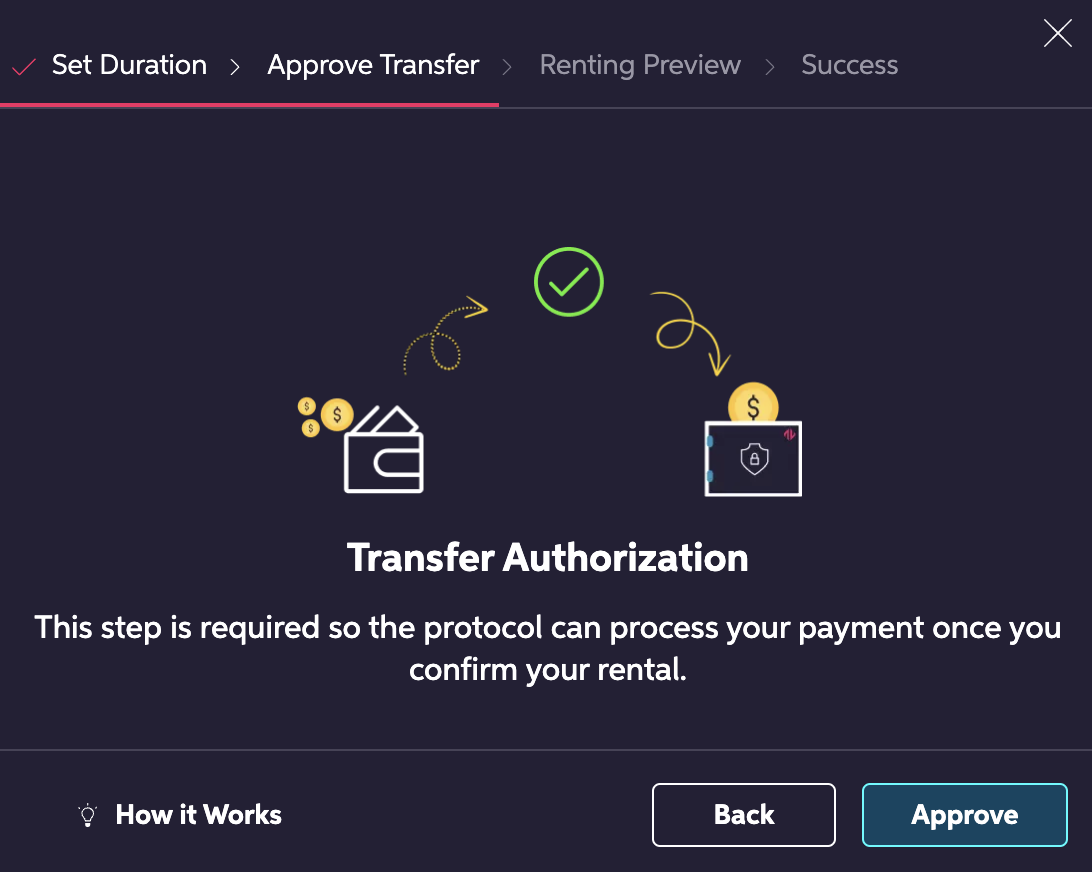
Authorize the $APE transfer in your Wallet. You won't pay for the rental during this step – you'll have a chance to double-check the rental conditions first. This is necessary so the protocol is allowed to process the payment on the next step.
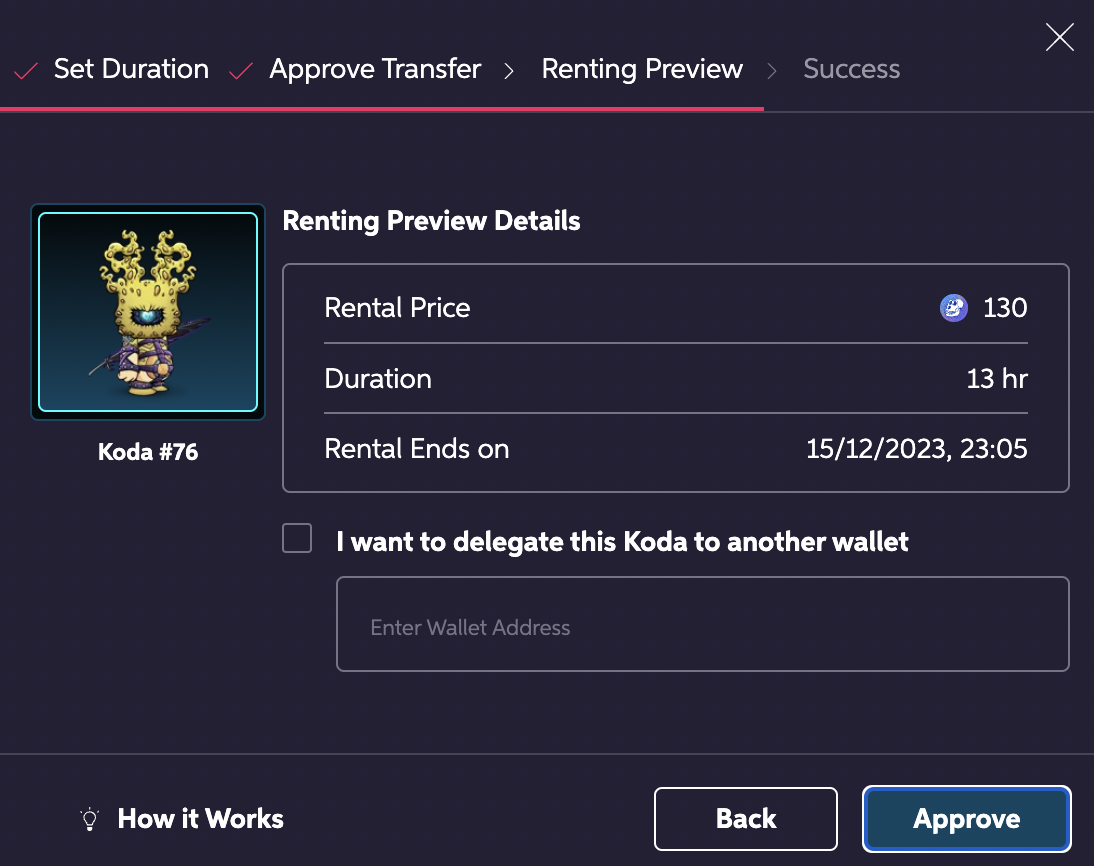
Double-check your rental's details. If you wish to use it on a different Wallet, check the delegation box and input its address.
If everything is good to go, click "Approve," then authorize the transaction in your Wallet.
And that's it! You can start using the asset right away.
Last updated